
Arguably one of the best day hikes in Iceland, we’ll walk you through everything you need to know about hiking the Fimmvörðuháls trail. Including our play-by-play of what to expect along the way, how to get back to the trailhead, and what essential items you’ll need to pack.
We think the Fimmvörðuháls hike is one of the best day hikes in Iceland—if not the best.
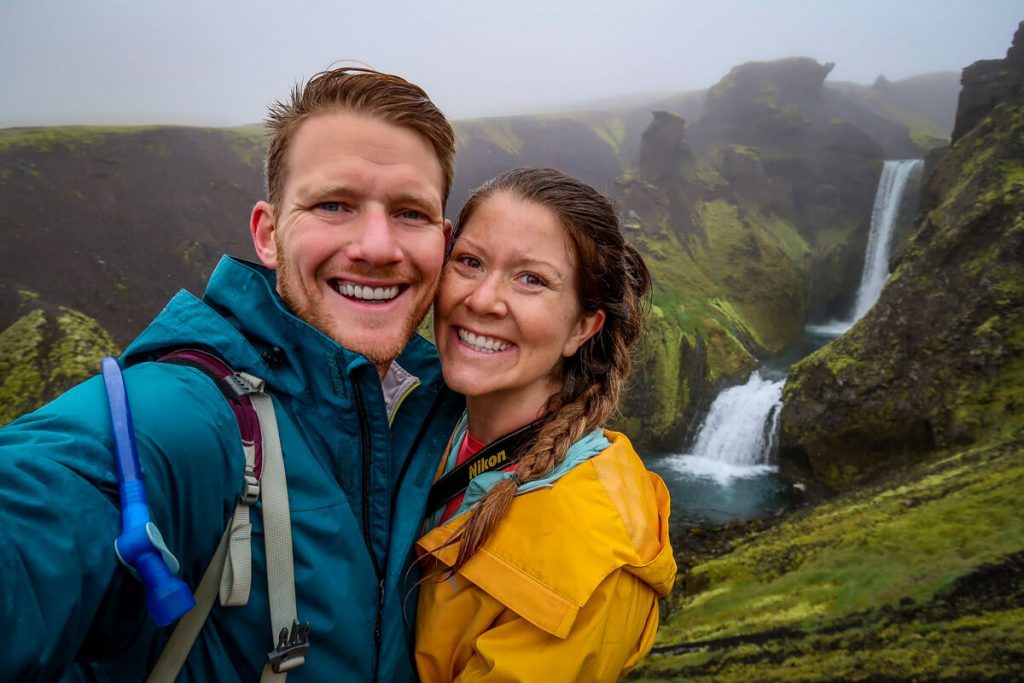
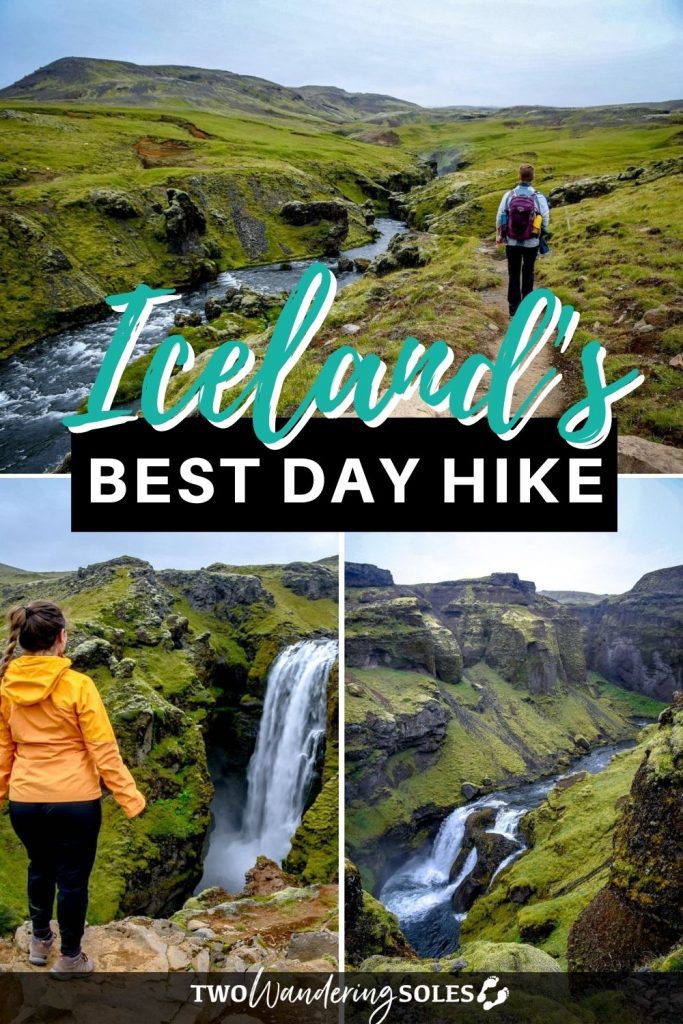
This epic trail delivers nonstop drama, taking you past 26 fairytale waterfalls, across snowfields and glaciers, through volcanic moonscapes, over moss-covered lava fields, and down into a lush valley named after the Norse god Thor.
It’s an unforgettable hike and easily one of the best day hikes we’ve done anywhere in the world! However, it does require a full day, solid planning, and a good level of endurance. If that doesn’t scare you off, it will likely be one of the top highlights of your Iceland trip (it certainly was for us!).
Lucky for you, we’ve done tons of research and recorded our own hike in great detail, because we’re nerds like that and we want to help you feel totally prepared.
In this guide, we’ll cover everything you need to know about hiking Fimmvörðuháls, including what to expect on the trail, how to handle transportation logistics, and exactly what to pack so you feel fully prepared.
Fimmvörðuháls Guide
- Highlights of the hike
- Fimmvörðuháls hike map
- Trail overview
- Fimmvörðuháls hike planning guide
- Alternate variations of the hike
- How to get there & back
- Hiking tips
- What to pack for the hike
- Where to stay nearby
Highlights of the Fimmvörðuháls hike
One of the best parts about this trail is that it brings hikers through some distinctly different landscapes – from lush valleys to desolate lava fields.
Here are some of our favorite things about this hike:
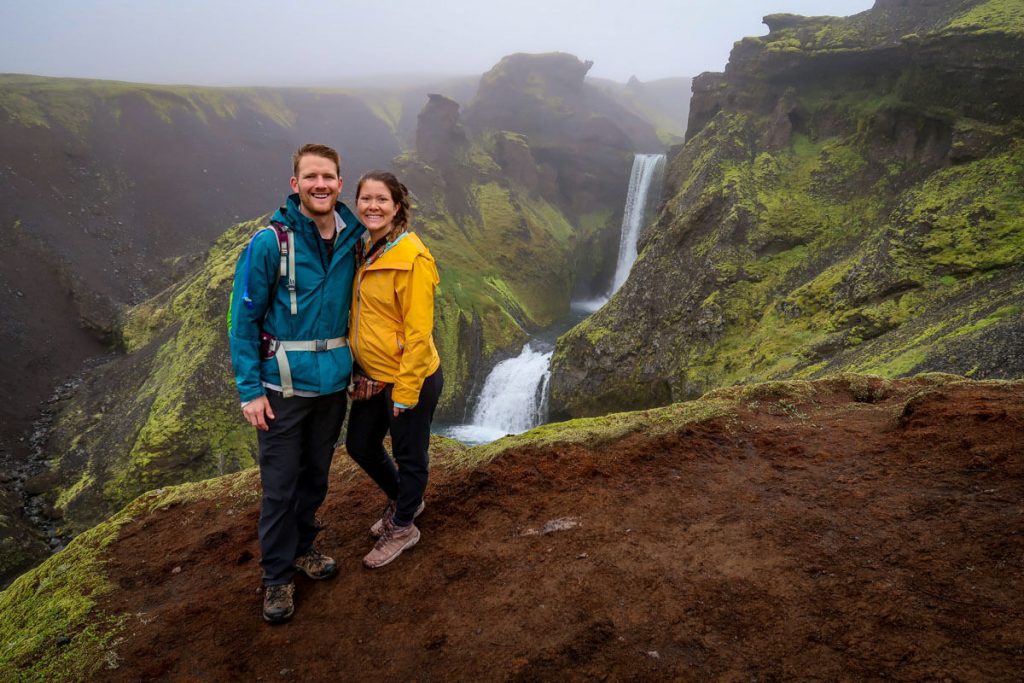
- Toward the beginning of the hike, there are 26 waterfalls along the trail. This is known as “Waterfall Way”, and while there are so many amazing waterfalls in Iceland, the falls on this trail were some of our very favorites.
- Being up close to glaciers and volcanoes in a landscape that looks like you’ve been plucked off of Earth and placed on Mars.
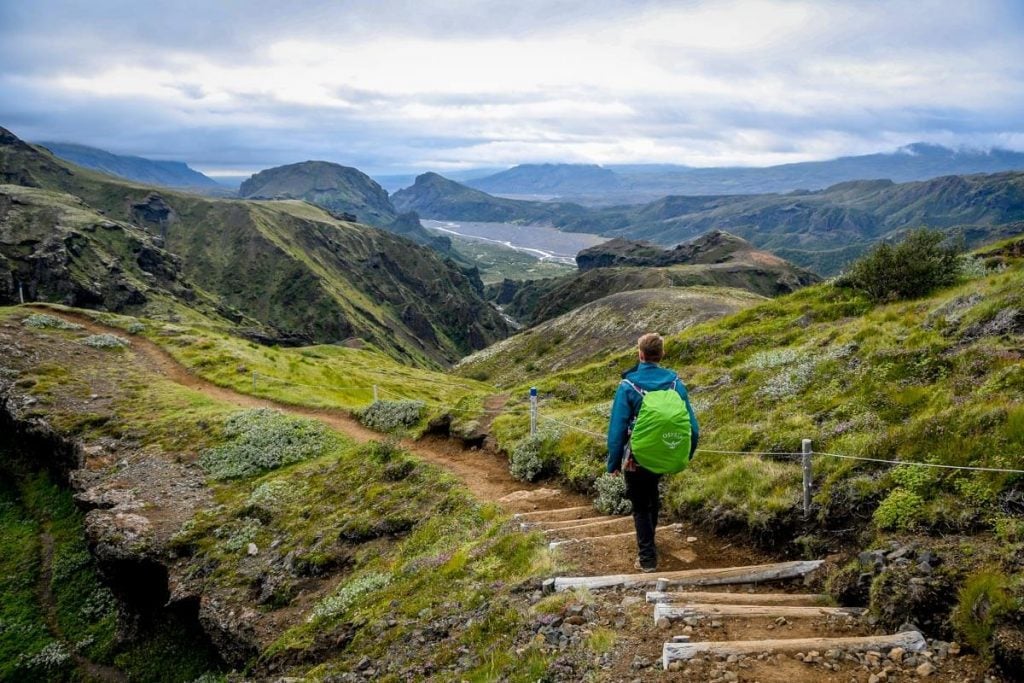
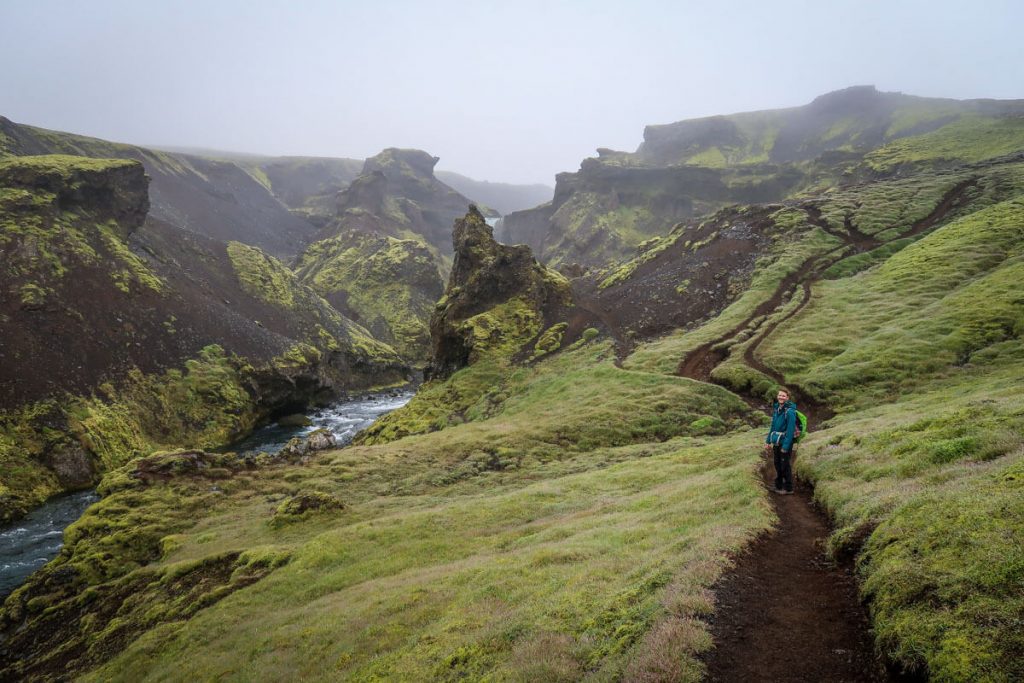
- The descent into the lush þórsmörk Valley is truly magical and you’ll feel like you earned the views as this is the culmination of the hike.
- Getting away from the crowds is pretty special, as many places in Iceland feel a bit touristy. This hike feels like a true adventure.
- The 4×4 bus that you’ll take out of the valley crosses through rivers and is a cool experience in itself.
Note: In English, þórsmörk is often spelled Thórsmörk, so you will see both variations in this article.
“How do I pronounce Fimmvörðuháls?”
I wondered the same thing! Here’s our best attempt at a phonetic spelling:
FIMM-vor-thoo-hauls
Remember, the “ð” symbol has a “th” sound.
Exploring Iceland’s South Coast? It’s one of the most stunning drives in the world — and our itinerary makes sure you don’t miss a thing. Day-by-day plans with waterfall stops, glacier hikes, black sand beaches, and the hidden gems between them. Find out what’s inside! →
Fimmvörðuháls hike map

Fimmvörðuháls trail overview
- Distance: 15.5 miles (25 km)
- Elevation Gain: 1,280 meters (4,200 feet)
- Type of trail: Point to point
- Difficulty: Hard
- Hiking Time: 8 to 10 hours, depending on your pace
- Starting Point: Skógafoss
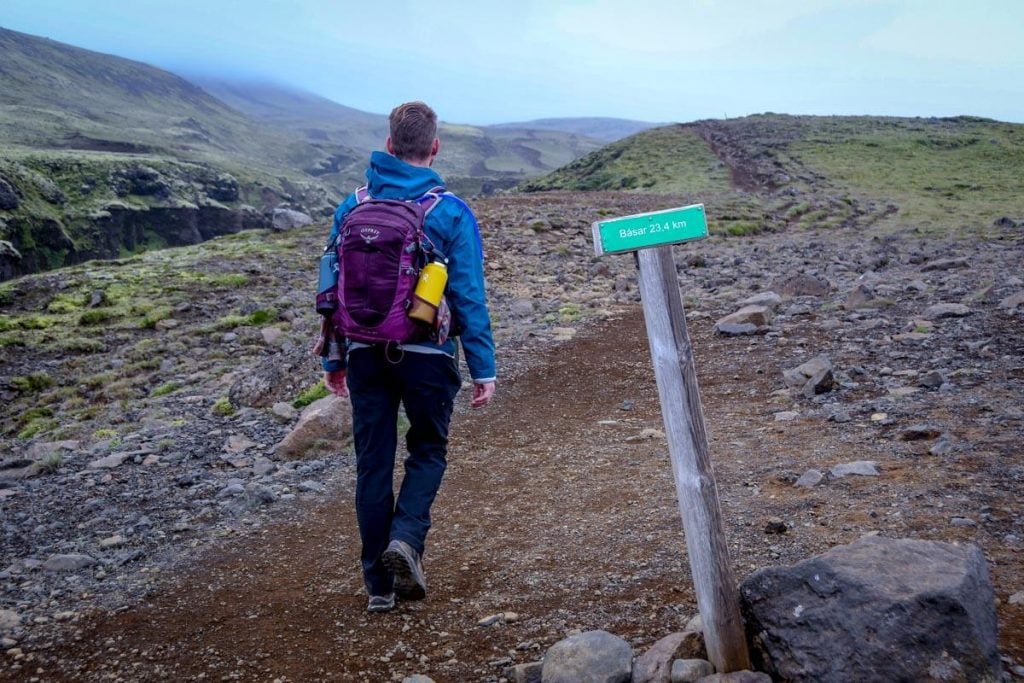
- Ending Point: þórsmörk (Básar Hut)
The trail begins in South Iceland at Skogafoss, one of the most famous waterfalls in the country. It follows the Skogar river and brings hikers between the Eyjafjallajokull and Myrdalsjokull glaciers before descending into a lush valley to the Thórsmörk Nature Reserve.
In this section, we’ll go over what to expect along this trail.
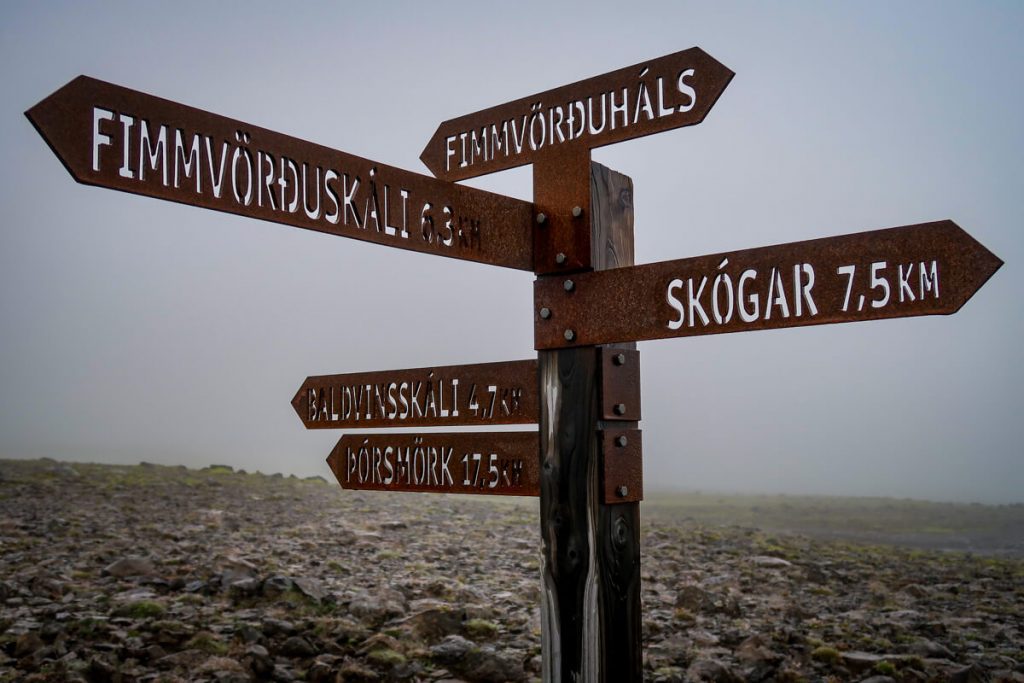
Good to know: Fimmvörðuháls translates to “five cairn pass”. The middle portion of the hike brings you between two glaciers, and cairns mark the trail (though there are definitely more than 5!).
Part 1: “Waterfall Way”
At a glace:
- Skogafoss > Waterfall Way > River Crossing
- Mile 0 to mile 5.4
- Trail condition: Trail is well-marked, uphill but nothing too strenuous
- Highlights: Lots of waterfalls and lush scenery
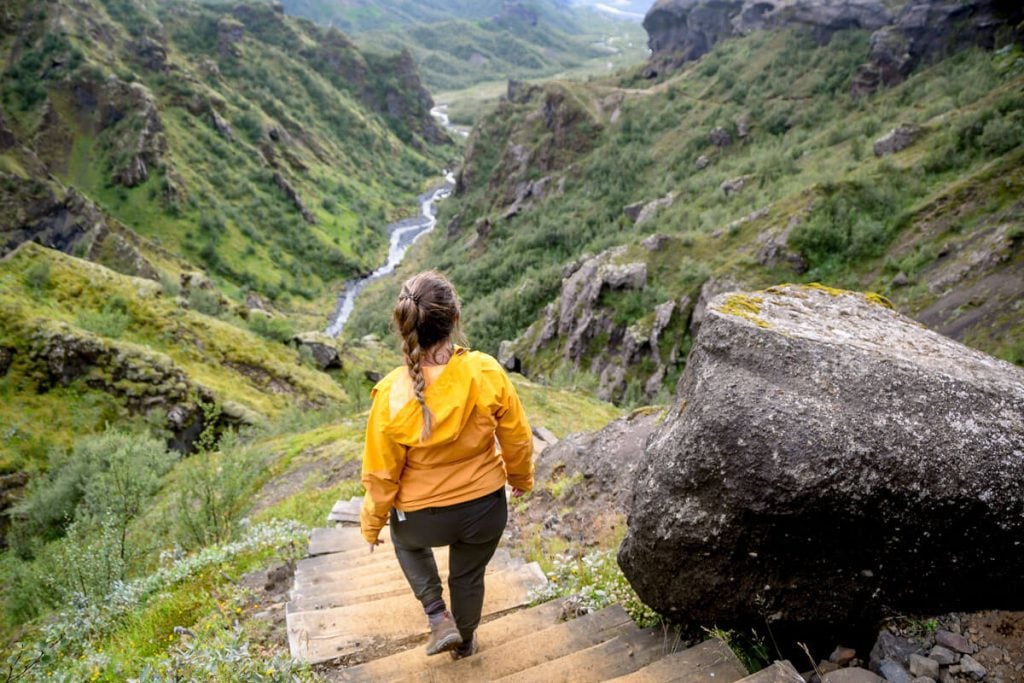
Skógafoss
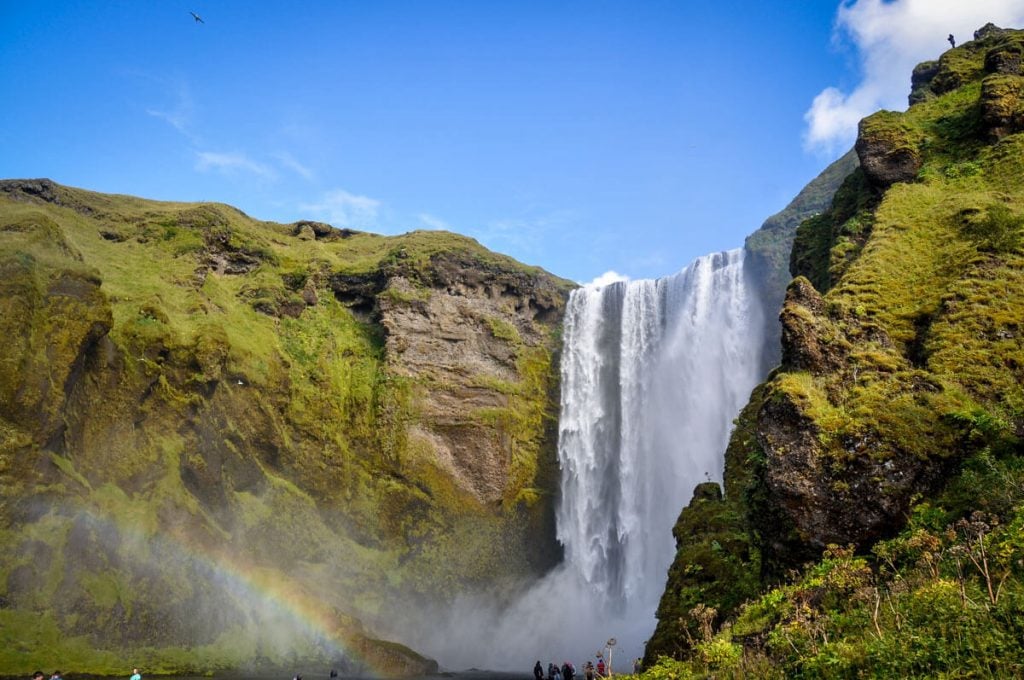
The Fimmvörðuháls trailhead begins at one of the most famous waterfalls in Iceland: Skogafoss. Situated just off of Ring Road this waterfall requires a short walk from the parking lot to reach.
Expect crowds here, as this is a very popular stop on the Ring Road.
Take the staircase up: Beside Skogafoss is a metal staircase that grants those who don’t mind getting their heart pumping a spectacular view above the powerful waterfall. This is where the Fimmvörðuháls Trail begins.
“Waterfall Way”
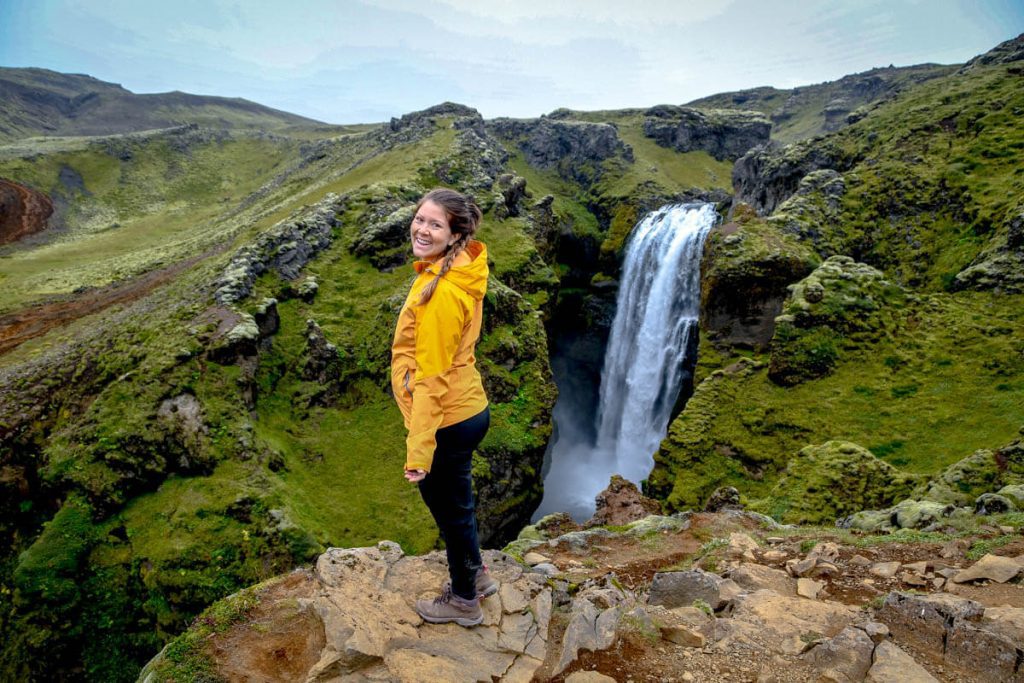
While Skogafoss truly is spectacular, continue walking on the well-marked dirt path and you’ll see why this portion of the trail is referred to as “Waterfall Way”.
Along this path, you’ll see 26 falls in total (we lost track, but that’s supposedly the total count!). Each of them seems to be more impressive than the last.
We noticed that the crowds started to thin after 1 mile or so of walking.
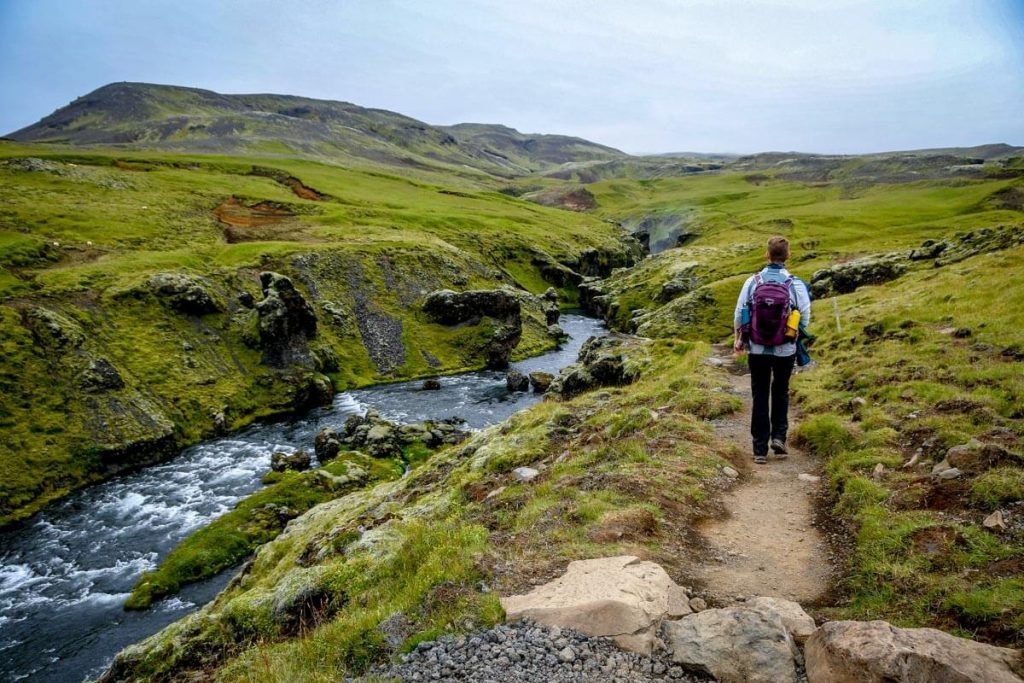
This section of the trail is mostly flat, signed with blue posts, and absolutely breathtaking. You may notice sheep beside the path, adding to the Icelandic countryside beauty. It continues like this for roughly 4.5 miles.
River Crossing
You will approach a narrow bridge that crosses the river, and this is where the landscape and weather can start to shift.
Here, you will have river access, which was the only place along the trail we noticed where it would be easy to fill a water bottle.
Cross the bridge and you will see some maps of the trail if you’d like to stop.
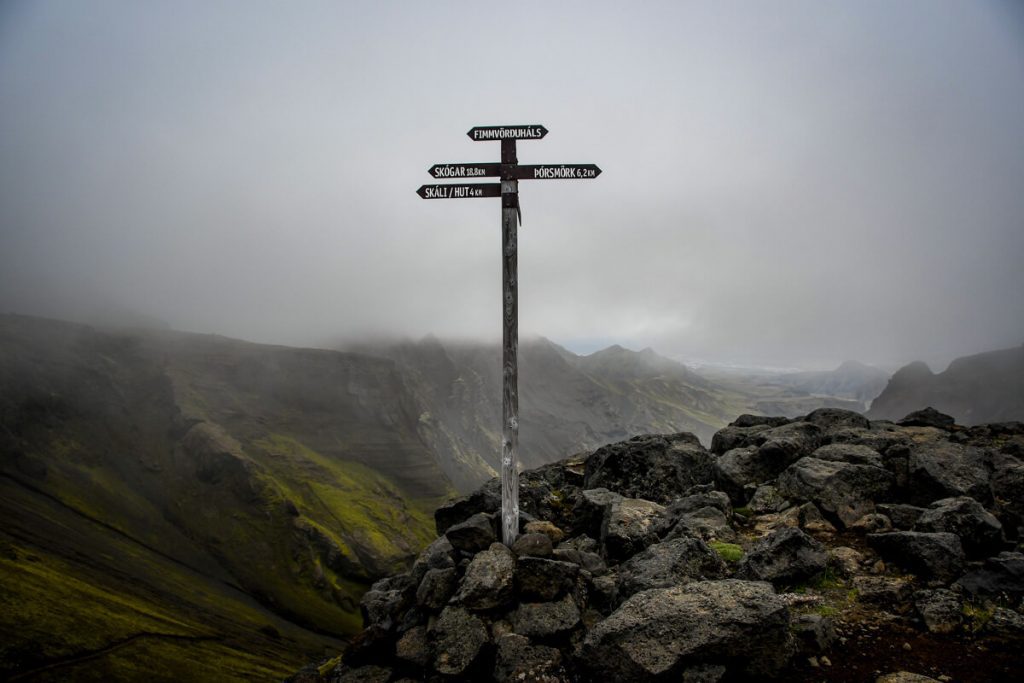
Part 2: Volcanic Plateau
At a glance:
- River Crossing > Baldvinsskali Mountain Hut > Snowfield Crossing > Glaciers & Volcanoes
- Mile 5.4 to mile 11.4
- Trail condition: Weather can be harsh and trail is difficult to find in some places; be careful when crossing snowfields
- Highlights: Interesting volcanic landscapes
Good to know: This section of the trail is notorious for harsh weather. We definitely noticed more fog, rain and colder temperatures almost immediately after crossing the river.
Lava Field
Instead of the river valley dotted with waterfalls, you will now be hiking on a rocky path through lava fields covered in moss.
The trail continues a gentle upward trajectory toward the mountain hut, which is your next landmark. For us, this section was pretty easy but more on the boring side.
The trail splits right after the river crossing, with the red route to the left and the blue route to the right. These trails are indicated by colored poles.
The Red Route goes to the west and follows the western fork of the Skoga River. It is longer and more difficult since there are greater descents and ascents on this route, but you do get to see more waterfalls. There was heavy fog the day we were there, so we decided to take the Blue Route.
The Blue Route goes to the east and follows the eastern fork of the Skoga River. It is a more direct route to the Baldvinsskali Mountain Hut, and since the weather was poor for us on the plateau, we decided to take this route.
Baldvinsskali Mountain Hut

If you want to spread out your hike over two days, you can spend the night in this rustic mountain hut, which sleeps 16 people and costs 17,000 ISK (~$135 USD) per person.
We’ve stayed at a few mountain huts around the world and have found them to be really cool experiences as long as you’re prepared for a shared sleeping space and very basic facilities.
Want to stop and have lunch inside?
It can be a nice place to get shelter from the wind, however, be prepared to pay a fee if you plan to use the hut’s facilities during your hike.
Interested in spending the night?
You can reserve a spot in the Baldvinsskali mountain hut here.
Note: We’ve heard mixed things about whether or not there is water at this hut. For the most part, we heard there is no running water, though we’ve also read recently that water can be purchased for a fee. Be on the safe side and pack your own water if you plan to stay here.
Alternatively, you can stay at the Fimmvörðuskáli Hut, which is a slight detour from the trail. Again, accommodations are rustic and there is no water or food available. You can make reservations by emailing utivist@utivist.is.
Snowfield Crossing
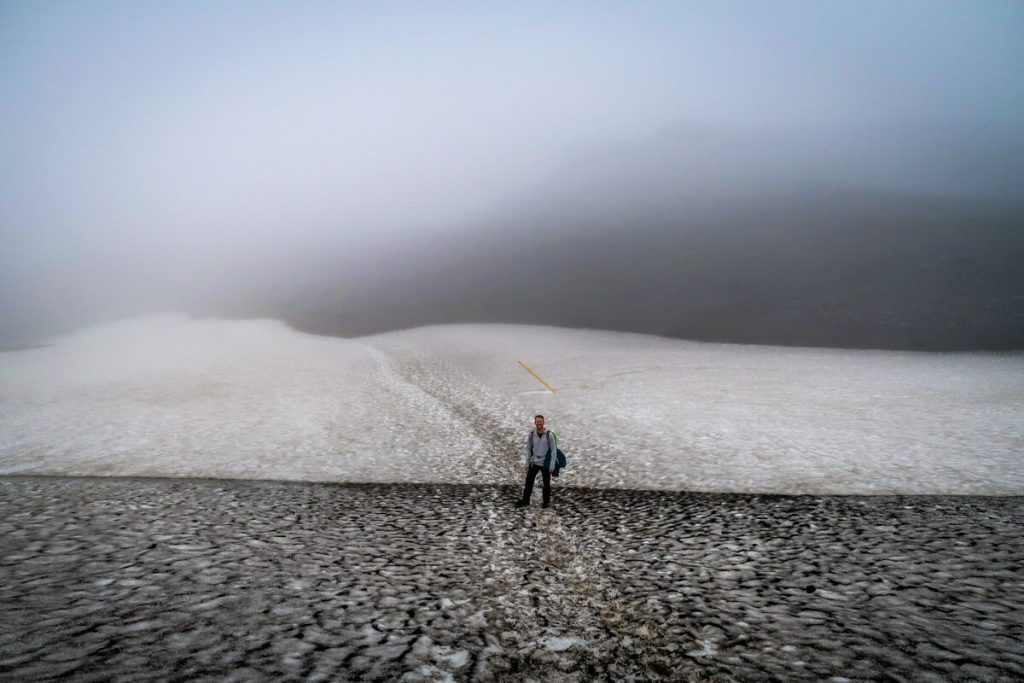
After the Baldvinsskali Hut, continue heading north and you’ll come across a series of snowfield crossings.
Use caution when entering and exiting a snowfield as the ice/snow mixture on the edges tend to be thinner than in the middle of the field. Try your best to follow the footsteps in the snow that others have left behind.
There are giant yellow poles marking the trail, but it was so foggy in some parts the day we hiked that we could only see one pole at a time.
Once you reach a pole maker, look up and try to spot the next one so you don’t accidentally go wandering off trail. Having GPS or a hiking app on our phone is super handy at this point.
You will soon cross Fimmvörðuháls Pass which is the highest point of the trail.
This accent is full of volcanic ash which acts a lot like sand. It’s extremely strenuous and a “two steps up, one step down” kind of hike until you reach the top. After this point though, there are not many more hard uphills.
Glaciers
The Fimm Hike brings you between two Icelandic glaciers: Eyjafjallajökull and Mýrdalsjökull.
In this next section you will notice beneath your feet is no longer compacted snow, but glacier ice with bits of volcanic rocks melted in. We actually found this section to be pretty easy because the rocks in the ice gave us better traction, but there were a few slippery spots.
Volcanoes

After the Fimmvörðuháls Pass, you will have a nice flat section for about a half mile.
If you look to the west, you’ll see two craters that were formed from the 2010 Fimmvörðuháls volcanic eruption. The craters that were created by this eruption are named Móði and Magni, after Thor’s two sons since Thórsmörk (Þórsmörk) is the end destination of the hike.
This eruption that was formed underneath the Eyjafjallajökull glacier in the spring of 2010 sent so much smoke and ash into the sky that nearly all airports in Europe had to close for six days.
Keep an eye out for a little sign that describes these craters. If you have time and the weather is nice, there is a short but steep side trail to the edge of Móði crater.
After the craters, there’s a few more snow fields, but then you start your descent toward Thórsmörk.
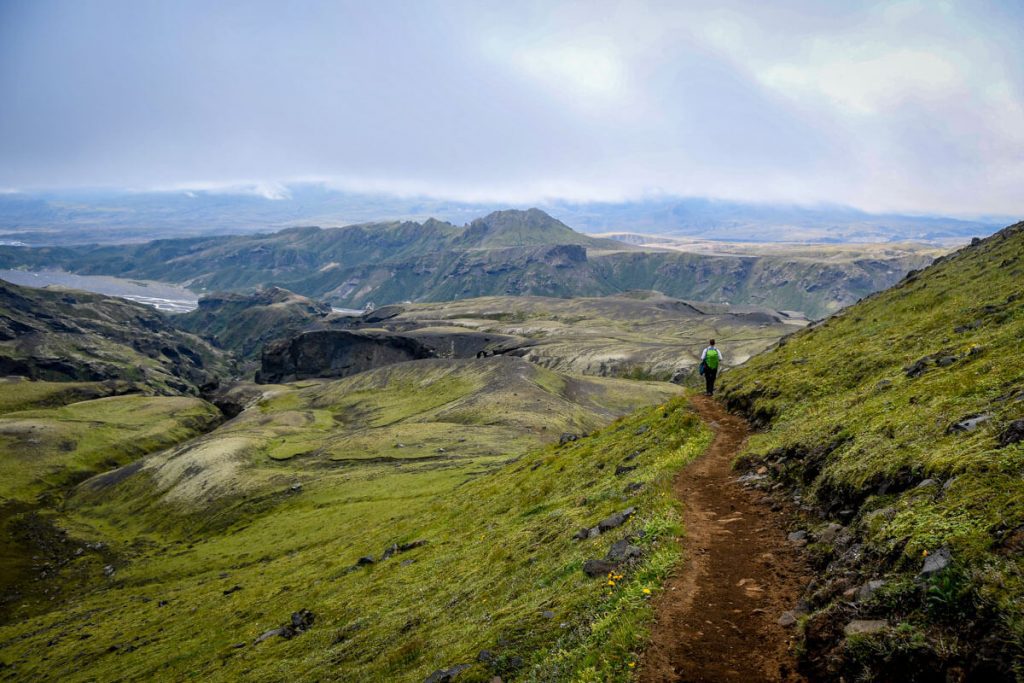
Part 3: Descent into Thórsmörk Valley
At a glance:
- Cat’s Spine Ridge > Valley Descent > Thórsmörk Básar
- Mile 11.4 to mile 15.5
- Trail condition: The ridge is a little steep and narrow, but the path becomes much more well-marked as you continue your descent
- Highlights: Lush, picturesque valley as you make your way down to Thórsmörk
Cat’s Spine Ridge (Kattarhyggir)
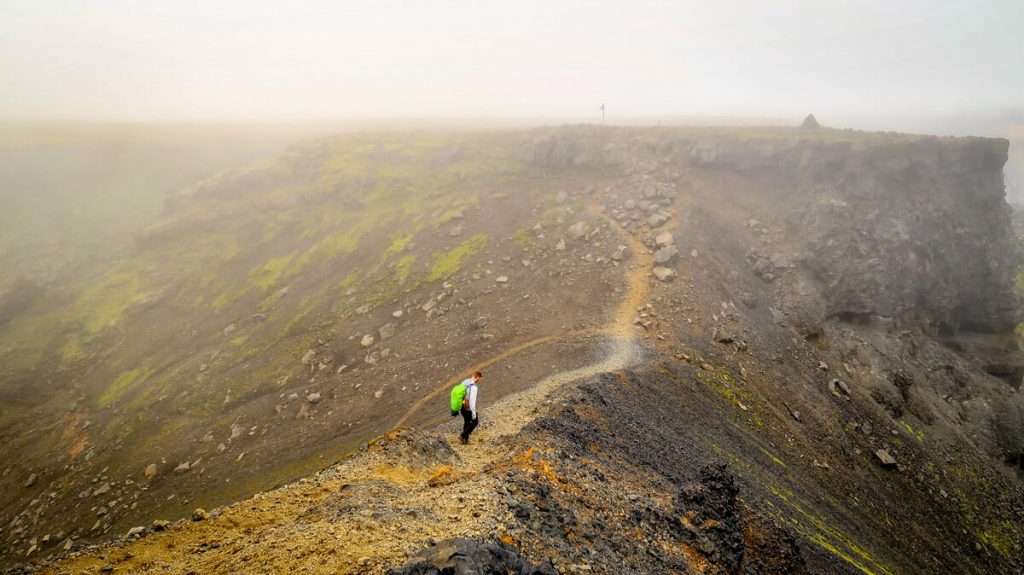
This is a narrow section of the path that brings hikers along a ridge. Be careful as the trail can be dusty, and the slope to either side is quite steep. We slipped on this section of the trail a few times, so take your time and use caution.
If you have clear views here, it is actually a pretty spectacular sight.
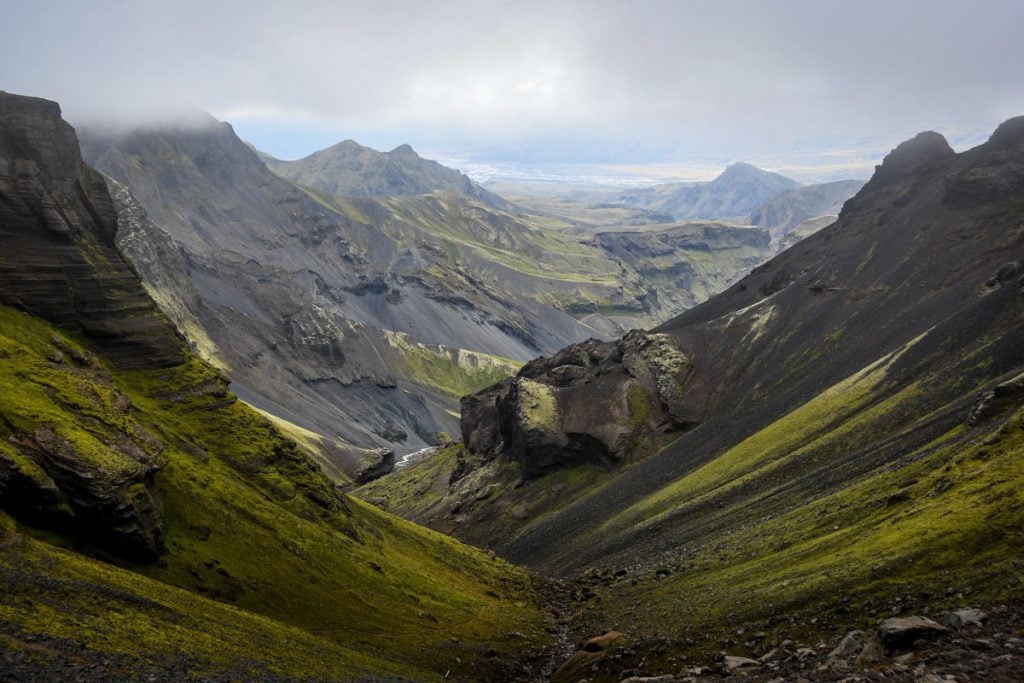
Descent into Thórsmörk Básar
As the path rounds a corner, you’ll start to see the landscape shift from rock-strewn and barren to a lush, green valley.
This portion of the trail is spectacular, and aside from a few steep and narrow areas, is a mostly mild descent.
→ Psst! Are you interested in more hiking?? We have a whole guide to the best hikes in Iceland with photos, details and insider tips to help you plan your trip.
Planning your Fimmvörðuháls hike
Still have questions about this hike? We’ve got you covered with all the information you’ll need to do this hike on your own.
We’re going to go over the most important things to know before you set off on this hike. So take notes, folks!
Best time to do the Fimmvörðuháls hike
Being that this hike brings you through higher elevation areas, the summer months are the best time to do this on your own. Mid-June through mid-September are generally recognized as the best time to do the Fimmvörðuháls hike.
You may want to check recent conditions, as the trail may still be snow-covered in mid-June, and wintry conditions may start to creep in during early September.
Unless you are very experienced in mountaineering and have proper equipment, this hike should not be attempted outside the June to September window.
→ Psst! Check out our article on the best time to visit Iceland to find out what the weather is like here year round and when is going to make the most sense to visit for YOU!
Weather on the Fimmvörðuháls trail
Weather in Iceland is notoriously unpredictable. And the same goes for this hike. You will want to be prepared for rain, sun, fog, wind, snow – the whole gamut!
A few days before your hike, check the weather forecast on the Veður app so you have an idea of what conditions to expect. However, know that it can change at a moment’s notice. For this reason, pack layers and waterproof clothing even if the forecast says sunshine.
As described in the section above, the “volcanic plateau” part of this hike will typically have much different weather than at the start of the trail.
→ Psst! For more info on what to bring, jump down to our packing list!
How long does it take to hike the Fimmvörðuháls trail?
This is going to vary a ton depending on your fitness level, your pace, and your comfort level with long distance hiking. The trail conditions can also play a factor as well as how many breaks you take.
In general, this hike typically takes people between 8 to 10 hours to complete.
Our experience
Moving Time: 7:10
In total, we were moving (aka walking/hiking) for 7 hours and 10 minutes.
Total Time: 8:38
With breaks, lunch and photo stops, the hike took us 8 hours and 40 minutes total.
- 10:10: got picked up and hitchhiked to Skogafoss
- 10:30: began the hike
- 19:05: arrived to the bus stop in Thorsmark
- 20:00: bus picked us up
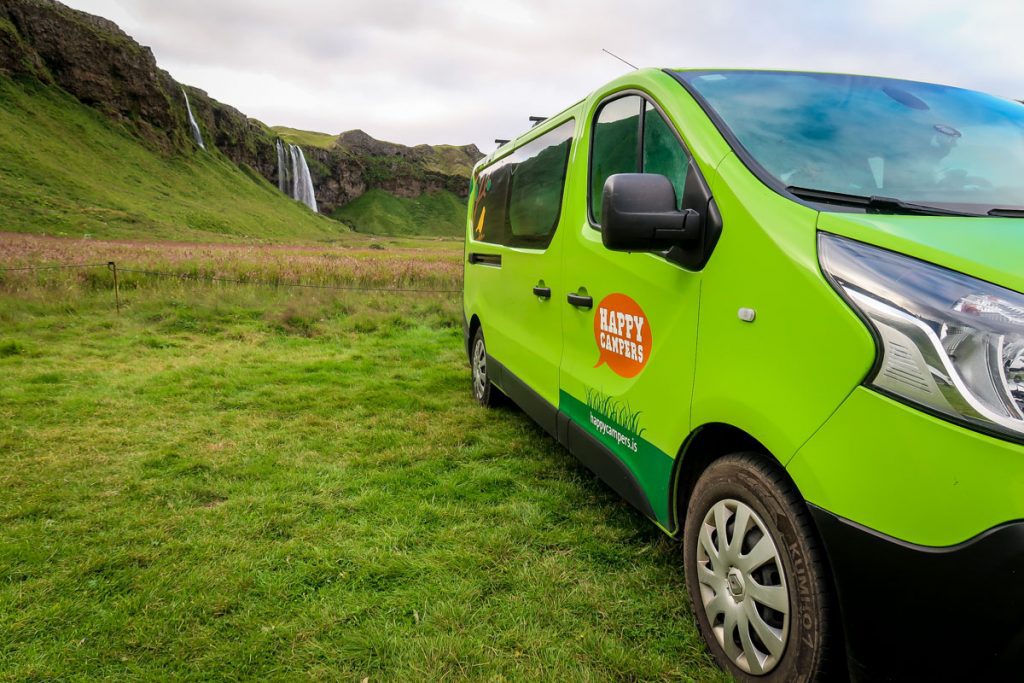
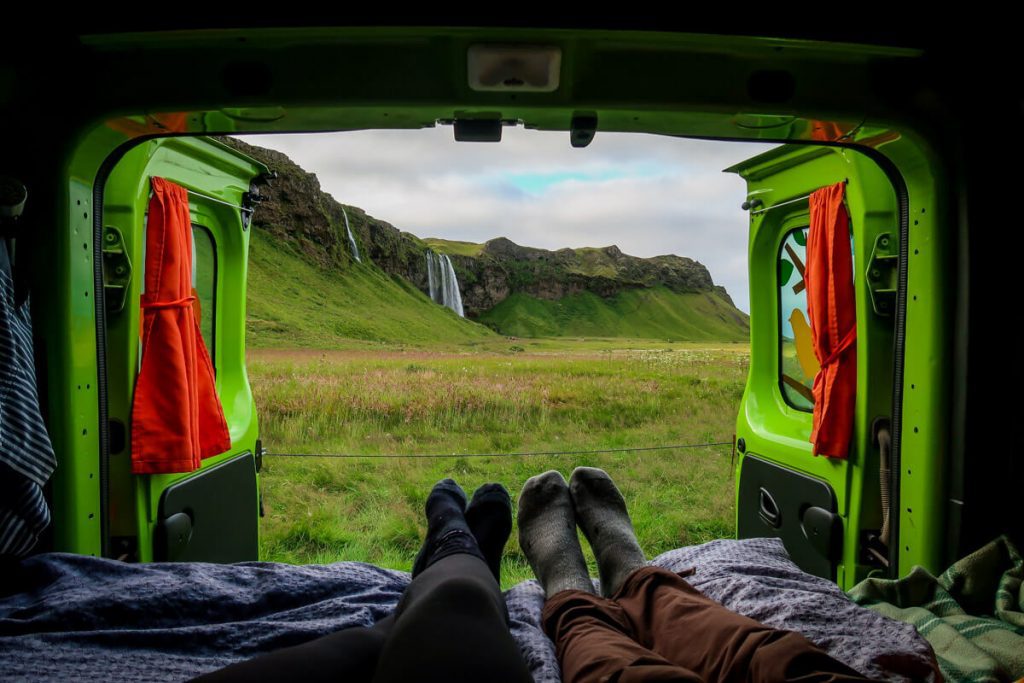
- 21:30: arrived back at our campervan, which was parked at the campground near Seljalandsfoss
We started this hike pretty slowly as it felt like we were taking photos every 50 steps. Let me remind you, there are waterfalls EVERYWHERE. If you like taking pictures, be sure to account for this.
Toward the end of the hike we started to get nervous that we would miss our bus pick-up (the last one of the night), so we had to hustle.
I would have loved to take more pictures and not feel so rushed on the descent into Thorsmork Valley as it is absolutely stunning (we wanted to fly the drone here, but thought we didn’t have enough time).
Turns out we got to the bus stop about 50 minutes early, so we were totally fine. But we just didn’t want to risk it.
In retrospect, I would have allotted just a bit more time just so I didn’t feel as rushed toward the end of the hike.
Our advice: If you’re not much for taking pictures (or just like to snap quick ones on your phone), you might not need quite as much of a buffer. But if you, like us, are into photography and are carrying equipment with you, be sure to account for many photo stops along the way (especially near the beginning and end of this trail).
How difficult is the Fimmvörðuháls hike?
Not gonna lie, this is not an easy trail.
That said, we saw people of all ages on the trail (teenagers to seniors), so don’t be too scared off. In fact, I did this hike at 6.5 months pregnant*! That said, most people on the trail seemed pretty prepared and well-equipped, which is the most important thing.
There are spots with some pretty significant elevation gain, so it’s important to be in decent shape. However, the main factor that makes this trail a bit challenging is the sheer distance. 15.5 miles is a lot of distance to cover in one day, especially when there are ups and downs.
If you’re not used to hiking long distances, we’d highly recommend getting out for a couple of 10+ mile hikes before attempting this one.
*We spent the entire summer before this trip living in our campervan and doing several long distance hikes. So even though I was pregnant, I felt very prepared.
Water along the trail
There are no water fill stations along the Fimmvörðuháls trail. Let me repeat that: you will not find any spouts or spigots along the way, so it is important to carry plenty of water with you.
At the 4.4-mile mark, there is river access, so you can fill your bottle here if necessary. (Since this is relatively early on in the hike, we still had plenty of water at this point.) While most water in Iceland is clean and safe to drink, we’d recommend having a sterilization method if you plan to fill your bottle here.
After this point, we did not see any good places* to fill water until we reached the camp in Thórsmörk.
*We did see a couple trying to fill their bottles from a tiny trickle at one of the snowfields. However, when we attempted to fill our bottle we got tons of sediment, making it undrinkable. We wouldn’t recommend relying on this.
How much water should I pack?
This is a common question no matter what hike you’re doing.
The general rule of thumb: carry half a liter of water for every hour of hiking.
Since this hike can take up to 10 hours, that means each person hiking should carry a minimum of 5 liters of water. This is where packing a water bladder can come in really handy.
Good to know: While this isn’t a trail you’ll likely need to worry about overheating (it is Iceland, after all!), it is still very important to be drinking enough water, especially since there is a decent amount of elevation gain along the way.
Toilets along the trail
There are facilities at the start and the end of the trail, but along the way, toilets are far and few between.
We only saw one toilet on the trail near the mountain hut.
We heard they charge a fee for hikers to use the toilet, but we can’t be sure as truth be told, we didn’t use this bathroom. We had already… how shall I put this… relieved ourselves elsewhere. Remember, I was 6.5 months pregnant during this hike, so my bladder definitely wasn’t going to wait for a toilet 8+ miles into the trail.
Important Note: In the next section, we’re sharing exactly how to go to the bathroom in the wilderness responsibly. Hint: It requires a little bit of extra effort and planning, but it is super important you follow some simple rules.
Variations of the Fimmvörðuháls hike
While the classic Fimmvörðuháls trail is one epic adventure, there are alternative paths you can take depending on how much time you have.
Have less time?
It is possible to do just a portion of this hike and turn around when you’ve had enough. The nice thing about doing just part of the trail is that you won’t have to arrange transportation as you’ll simply hike back to the starting point.
We’d recommend setting a goal of making it to the 4 to 5-mile mark, as that is the end of the waterfall portion (for the most part).
While you’ll miss the glaciers, the volcanic moonscape and Thórsmörk Valley, this will still be an amazing hike without too much elevation gain.
Have more time?
Split the hike over two days
Stay at one of the mountain huts along the way for a very unique experience. Just be prepared for the accommodations to be rustic!
Add the Laugavegur Hike
If you have several days and want a true backcountry adventure, consider the Laugavegur Trail. This iconic 4-day, 34-mile (54 km) trek crosses some of Iceland’s most remote landscapes, with overnight stays in tents or mountain huts and all gear carried with you.
You can finish in Thórsmörk or continue on to Skógafoss, combining the Laugavegur and Fimmvörðuháls hikes into one epic route. The trail can also be hiked in reverse, though transportation logistics will differ.
See our complete Laugavegur Trail hiking guide for everything you need to know to plan your trek.
How to get there and back
Figuring out transportation is probably the most complicated part about attempting this hike. We spent hours researching, so hopefully we can save you the trouble.
We’ve laid out your best options for transportation to and from the Fimmvörðuháls hike.
First, let’s start with what makes this a bit complicated…
- Since this is a point-to-point trail, you will be starting the hike and ending the hike in two different places.
- Start Point: Skógafoss
- End Point: Thórsmörk (Básar)
- There are a few different “camps” in Thórsmörk. The one where you will catch the bus is Básar.
- To make things a bit more challenging, the end point of the hike is in Thórsmörk Valley, which can only be accessed by pretty rugged 4×4 vehicles.
- If you hike from south to north (Skógafoss to Thórsmörk), like most people do, this means you must arrange transportation to get you back to where you started.
Best transportation options (highland bus)
Taking the Highland Bus (aka these 4×4 busses that are specifically designed for the rough terrain and river crossings of the Icelandic Highlands) is the best and most affordable transportation option for your Fimmvörðuháls hike.
Our top recommendation…
Self Drive > Bus > Self-drive*
- Park at Skógar (start of the trailhead)
- Hike
- Take a bus from Thórsmörk to Skógar
Route only offered by Volcano Trails.
*This is a newer bus route offered that makes for the easiest transportation (albeit slightly more expensive). Unfortunately, this route was not available during the summer of 2021 when we did this hike.
Self Drive > Hitchhike > Bus*
- Park at in Hvolsvöllur at or near the N1 Service Station (drop off point for the bus)
- Hitchhike to Skógafoss
- Hike
- Take a bus from Thórsmörk to Hvolsvöllur
Route available from Icelandia and TREX.
*This is what we personally did and would recommend if you are on a tight budget and want to save money on bus costs. (The difference is about €25 per person.)
Self Drive > Bus > Hitchhike
- Park at Skógafoss (start of the trailhead)
- Hike
- Take a bus from Thórsmörk to Hvolsvöllur
- Hitchhike from Hvolsvöllur to Skógafoss
Route available from Icelandia and TREX.
Bus from Reykjavik & back
- Bus from Reykjavik to trailhead
- Hike
- Bus from Thórsmörk back to Reykjavik
Route available from Icelandia and TREX.
We’ve gone into more detail about what each option looks like in the descriptions below:
Highland Bus

No matter how you plan to get to the trailhead (self-drive, hitchhike, etc.), you will still need a bus ticket to get back.
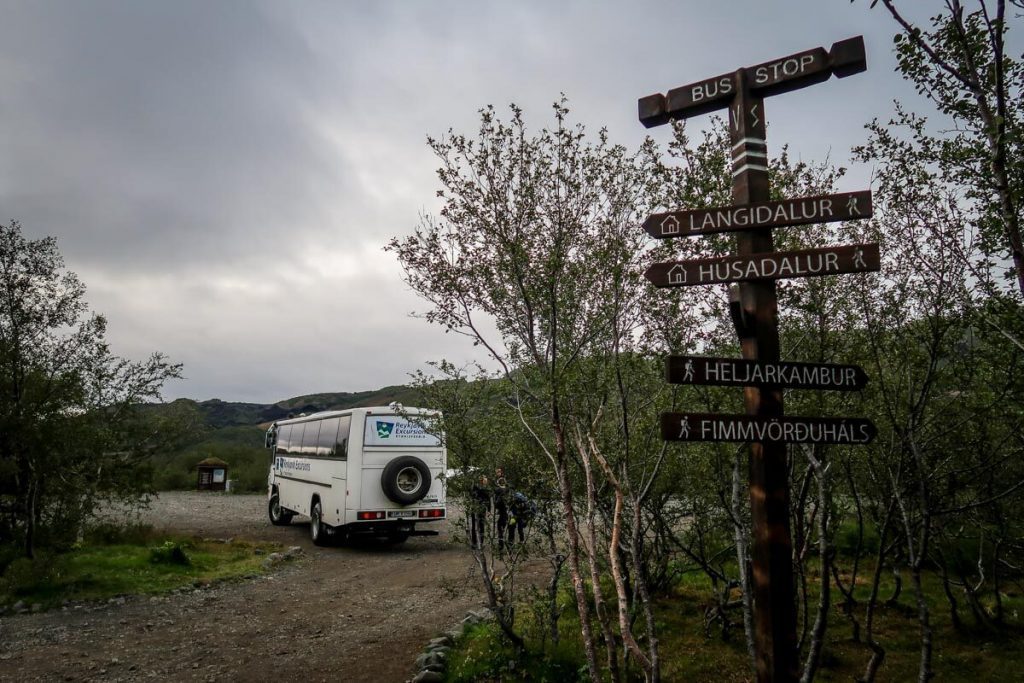
Thankfully, there are a few bus companies that operate out of this remote location, and the 4×4 bus trip is quite an experience in itself (you’ll cross a river, which is pretty cool!).
But the not-so-great news is that these tickets aren’t exactly cheap. Additionally, there aren’t all that many times to choose from.
When you’re looking for bus tickets, it can be a little tricky knowing which locations to select as your start and end points.
- Starting point: Select Þórsmörk Básar, where the trail ends.
- Ending point: Choose your next stop.
- Skógar (trailhead start location)
- If you’re camping near Seljalandsfoss, book Hvolsvöllur and tell the driver to drop you at Seljalandsfoss.
- You can also continue on to Hella, Selfoss or all the way to Reykjavík.
This is our top recommendation…
Þórsmörk Básar to Skógar (no hitchhiking required):
Route only offered by Volcano Trails:
Available June 1 – September 15; 12,900 ISK (~$106 USD)
- 8:30 pm bus from Thorsmork Basar (arrives at Skógar by 10:00 pm)
Þórsmörk Básar to Hvolsvöllur (hitchhiking required):
Route available from Icelandia:
Available June 1 – September 24; €72.30 (~$86 USD)
- 3:00 pm bus from Þórsmörk Básar (Útivist)
- 8:00 pm bus from Þórsmörk Básar (Útivist)
Route available from TREX:
13,900 ISK (~$115 USD)
- 2:45 pm bus from Þórsmörk Básar – available June 21 – September 6
- 6:15 pm bus from Þórsmörk Básar – available June 26 – August 23
Round trip* from Reykjavik (no driving/hitchhiking required):
If you are planning to do this hike from Reykjavik, it is possible to get a bus ticket from the capital city to the trailhead at Skógar, then a return fare from Thórsmörk back to Reykjavik.
Route available from Icelandia:
Available June 1 – September 24
- 7:00 am bus Reykjavik to Skógar – €68.86 (~$82 USD)
- 3:00 pm bus Þórsmörk Básar (Útivist) to Reykjavik – €72.30 (~$86 USD)
- 8:00 pm bus Þórsmörk Básar (Útivist) to Reykjavik – €72.30 (~$86 USD)
*It’s not truly round trip, as the start and end points are different, but you get the point.
Hitchhiking in Iceland
If you’ve never hitchhiked, this might sound a bit scary, but hear me out…
- Iceland is a very safe country and hitchhiking is relatively common among travelers. (Our campervan rental company even told us where hitchhikers could sit in the van should we choose to pick anyone up!)
- There are many people driving the Ring Road, and the most likely people to pick you up are other tourists.
- It is just a short distance (30km / 18 miles) that you will need to travel. Additionally, you will be picked up and dropped off at two very famous waterfalls, so there is a good chance that there are other tourists on the same exact route.
Tips for hitchhiking
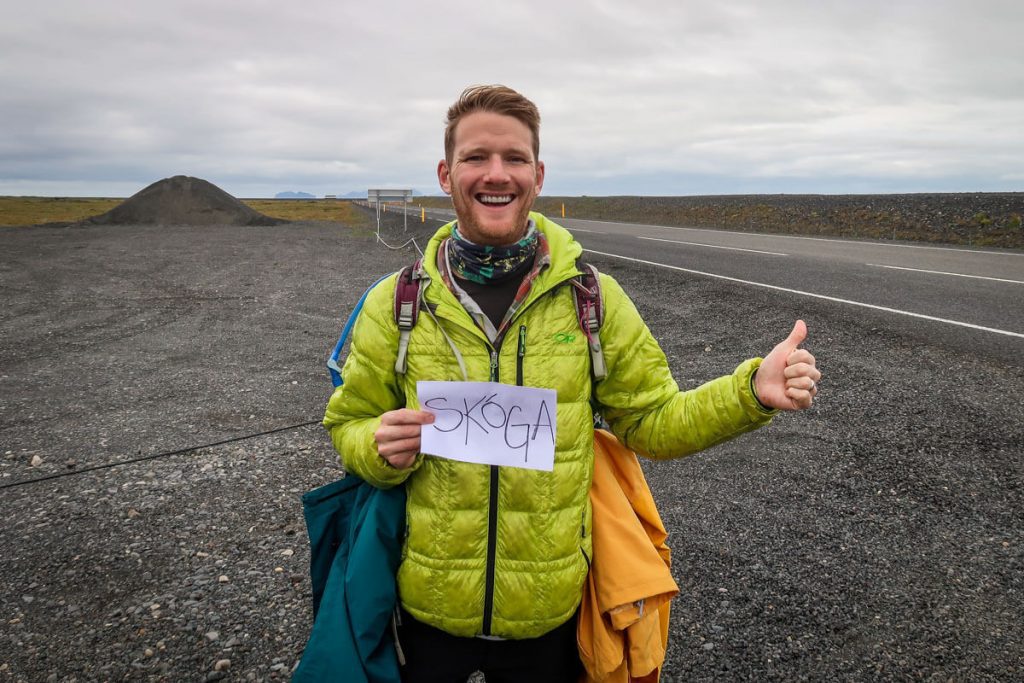
- Make a sign: All it needs to have is your destination in large, clear writing. In our case, that was Skogafoss. We actually made this sign at home and brought it with us so we didn’t have to scramble to find markers and cardboard.
- Smile: People are more likely to pick up someone who is smiling than a person who looks miserable.
- Hitchhike in the morning: If possible, get the hitchhiking portion of your journey out of the way in the morning time. This is when there are more tourists on the road and you’ll have the best chance of being picked up. It wouldn’t be very much fun to stand on the road with your thumb up after a long hike as the sun is setting, after all.
- Give yourself ample time: It’s not guaranteed that you will be picked up by a certain time, so be sure to give yourself a buffer. Since you’ll need to catch a bus in Thorsmark, you are working with a timeline. Don’t push it.
Our experience with hitchhiking in Iceland
We camped near Seljalandsfoss the night before (sadly that campsite is no longer open) and paid for an extra night so we could leave our van there during the hike.
In the morning, we geared up and walked a short distance to the entrance of Ring Road. We made sure to stand on the side where people would be turning in the direction we wanted to go.
We gave ourselves 30 minutes to find a ride—but were picked up in just 4 minutes. A lovely German couple on their honeymoon drove us to Skógafoss, which happened to be their destination too, making it an easy and pleasant 30-minute ride.
Important safety note about hitchhiking
We rarely recommend hitchhiking, but we feel confident suggesting it here. That said, it’s always at your own risk. While things can go wrong anywhere, this stretch of highway is generally considered one of the safest places to hitchhike.
The biggest concern is timing—not safety. Pickups aren’t guaranteed, so be sure to build in extra buffer time in case you have to wait.
Other transportation options
You may be wondering if there are any other transportation methods to use for the Fimm hike…
Arrange transportation with your guesthouse
If you are staying at a hotel nearby, message them before your trip and ask if they would be able to arrange a ride to/from the trailhead. Be sure to ask how much this will cost. This may or may not be a possibility, but it’s worth looking into.
What about a taxi?
I’m going to be up front with you: Unless you’re traveling in a big group and have a huge budget, taking a taxi to or from the trailhead is not a good idea.
Why?
- It is going to be extremely expensive. We saw one quote that was $160 for a 30-minute drive – yikes! (This was back in 2021, it is likely double that now, considering the price of bus tickets has doubled.)
- You’re still going to need to make reservations in advance as the trailhead is not located near a town, meaning you can’t just flag a driver down from the road.
Also no, Uber is not available in Iceland. And yes, I can read your mind.
→ There are SO many incredible stops along Iceland’s South Coast that it’s easy to either rush through or miss things entirely. Our itinerary paces everything perfectly so you see the highlights without feeling hurried. See the full 7-day route →
Fimmvörðuháls hiking tips
Before lacing up those hiking boots, be sure you read through these tips to help prepare you for this hike.
1. Check the weather forecast
A few days before your hike, start checking the weather forecast. The most accurate app for Icelandic weather is Veður. They also have an English website you can check here.
2. Be prepared for rain and fog
While checking the weather is a good first step, you’ll definitely want to be prepared for just about anything, as you are almost guaranteed to encounter a variety of conditions during this hike. This means having proper gear and also a positive attitude.
Hot tip: If you think you’ll be miserable hiking in wind and fog, this trail may not be the one for you.
3. Pack layers, waterproofs & sun protection
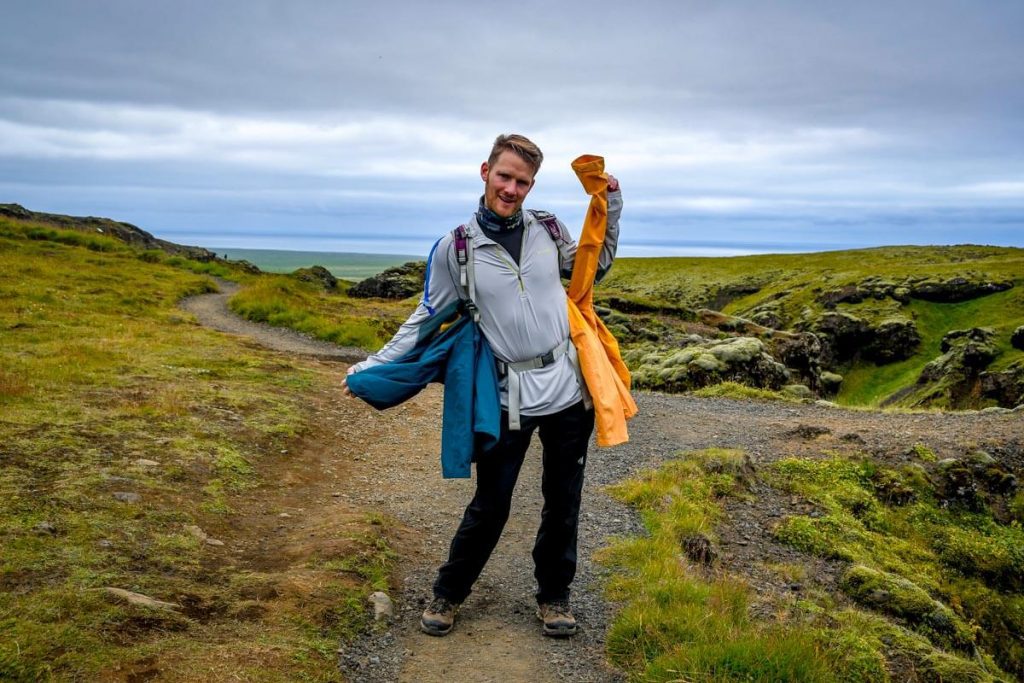
You’ll be hiking through different elevations and climates, so be sure to pack warm layers, waterproof clothing and a dry bag.
Most people who don’t have great experiences on this hike simply haven’t been prepared to endure the variety of weather and elements along the way. Don’t make that mistake!
4. Read recent trail reports
Before starting any long distance hike, we like to sift through recent trail reports people have left on sites like Alltrails. This can be particularly helpful as people will often report if there are any trail conditions to watch out for, like snow-covered sections or landslides.
5. Plan for this hike to take longer than expected
Unless you are staying overnight in Thorsmark (which we wished we had the time to do!), you will need to arrange transportation back to Highway 1. This means you will have a deadline for finishing this hike.
Do not – I repeat – do NOT underestimate how long this hike will take you. There’s nothing worse than having to run through the end of the hike in order to make the last bus of the day. (We’ve definitely been there.)
Give yourself at least an hour longer than you think it will take you to complete the hike, as you will likely want to stop for pictures (we made many photo stops!). You’ll also want to stop for snacks and lunch along the way.
Our experience: We had a feeling we could do the hike in 8 hours, but we allotted ourselves 10 hours so that we never felt rushed.
6. Book your transportation in advance
We’ve already gone over how to get to and from this trail (jump to that section!), but it’s worth repeating that it is very important to have a plan for your transportation in advance.
The buses do fill up so you’ll want to reserve your seat prior to setting off on the trail.
During peak season (which is likely when you’re doing this hike), the buses can completely fill up. So our advice is to book your bus ticket as soon as you know which date you’ll be hiking.
7. Pack enough food and water
We’ve already gone over the fact that there aren’t great places to fill up water along the trail, so it’s important to bring enough to last you the entire hike. Same goes for food. This is a long trail, so you’ll need to sustain your energy with meals and snacks.
8. Have a plan for the bathroom
So here’s the thing… on a 15.5-mile hike, you’re going to need to go to the bathroom at least once (if not more!). As we’ve already mentioned, there aren’t many toilets on this trail, so there’s a fair chance you’ll find yourself with the urge to go when there’s no toilet in sight.
So what is one to do?
Well, for guys it’s pretty straightforward. For ladies, poppin’ a squat is going to be a likely situation.
Now, here’s where I want you to pay attention… Please, do not leave TP on the trail. (I really hope I don’t have to explain why.) Drip drying is one option, but if you need to wipe, there are two solutions:
- Bring a small plastic bag in which you can pack out your used toilet paper.
- Invest in a Kula cloth (a reusable pee cloth). I was pretty opposed to this idea at first, but I have come to actually really like it.
One thing to note is there isn’t much privacy (aka tree or rock cover) along this trail. Don’t wait until you’re desperate. The good news is that after about mile 5, there aren’t a ton of people on this trail, so as long as you’re quick you shouldn’t have too much of a problem.
→ Related reading: If you’re not already familiar, read up on the Leave No Trace guidelines for responsible hiking practices.
9. Stick to the marked trail
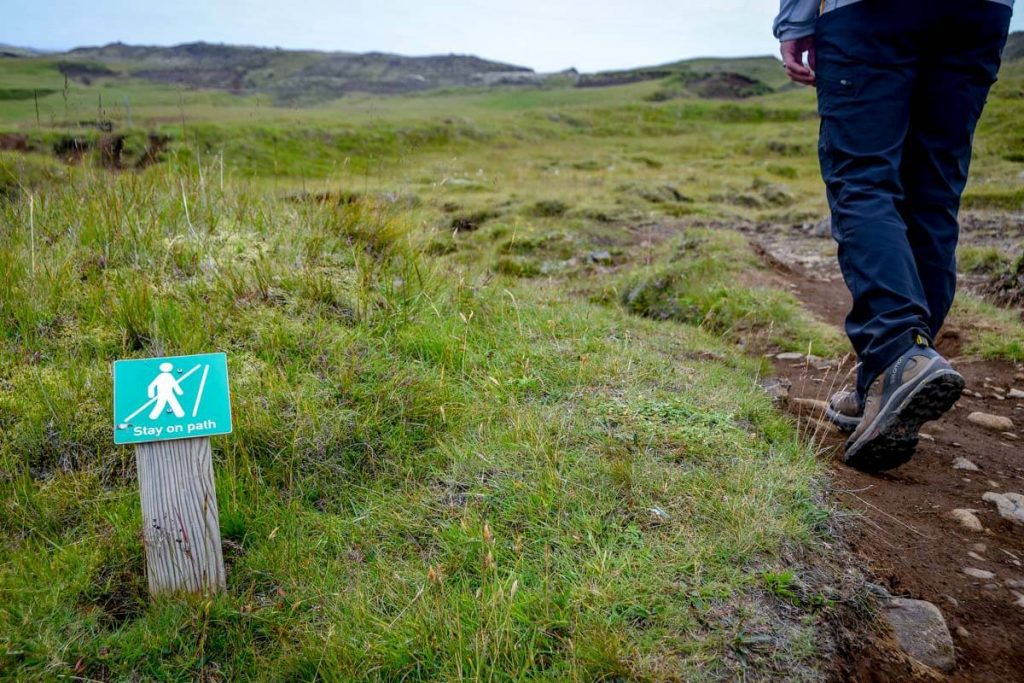
While it might be tempting, don’t step off the path as much of Iceland’s ecosystems are very fragile. Trampling on vegetation can make a much larger impact than you might think.
There are trail markers the entire way, and most of the hike should be easy to follow. The exception to this is when you are crossing the snowfields in “Part 2” of the hike. For this section, look for giant yellow markers that signal the proper path.
10. Download these apps before your hike
Before you begin the hike, be sure you have anything downloaded to your phone that you will need as you won’t have cell signal for most of the way.
We use Alltrails+ for navigation, so we made sure to download the offline version of this hike prior to starting. This allows us to see our real-time GPS location and to record our hike. It’s really handy for seeing how much distance and elevation you’ve covered as well as how much you have left.
Insider tip: Get your first week of Alltrails+ for FREE when you sign up using our link!
We’d also recommend that you download the 112 app which allows you to contact emergency services if needed.
→ Psst! We’ve got a whole list of all the apps you should download before your Iceland trip!
What should I pack for the Fimmvörðuháls hike?
A common question for a hike this long and diverse. We have everything you need to pack so you are fully prepared to hit the trail.
What to wear
- Hiking clothes (whatever you are most comfortable in)
- Extra layers
- Beanie and gloves (yes, even in the summer!)
- Rain jacket
- Rain pants (we didn’t have these but wish we did)
- Hiking boots
- Wool socks (to wick the moisture away and keep blisters at bay)
What to pack
- Hiking day pack with a rain cover
- Dry bag (for valuables)
- Water bottles (and/or water bladder)
- Sunscreen and sunglasses
- Hiking poles (optional): We didn’t have poles, but there were some sections where they would have been really handy
- Navigation
- Paper map
- OR a phone with AllTrails+ offline version downloaded + battery pack to charge phone (essential if you plan to use your phone for navigation)
- Toilet stuff: toilet paper & plastic bag to carry it out, or a Kula cloth
- First aid kit: Be sure you have lots of options for blister care, as this is a long hike
- Bus tickets (printed out or saved onto your phone)
- Portable battery power bank
Do you need crampons or microspikes? In our opinion, these are unnecessary if you are hiking during the summer months. Even though we crossed many snowfields, we did not use the microspikes we had packed. Our sturdy hiking boots were sufficient enough, and the spikes would have been cumbersome to keep putting on and taking off (as there are a couple of snowfields in a row).
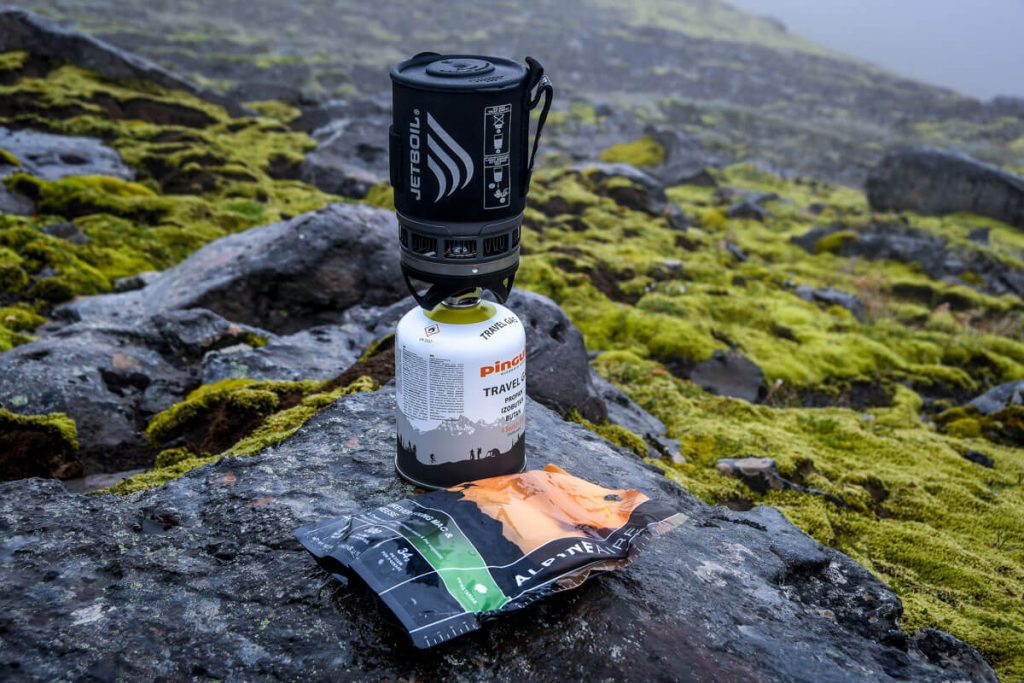
Food and snacks
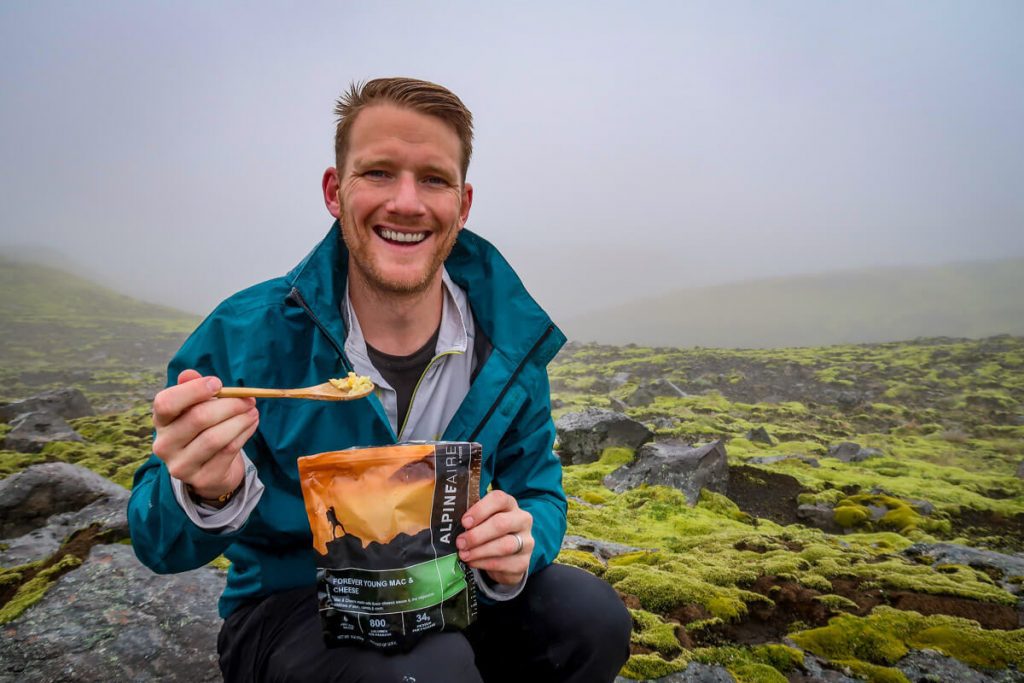
- Meals: We brought dehydrated backpacking meals (packed from home) and a Jetboil (and a lighter!) so we could have a hot lunch which was super nice on this trail. That said, packing sandwiches is a simpler option if you don’t have the equipment.
- Snacks: Trail mix, dried fruit, protein bars, chocolate, gummy candy, etc. (we packed most of these things from home)
- Check out this list of our favorite hiking snacks!
→Related: We’ve written a guide to Icelandic supermarkets so you know what items you can get there and what you should pack from home.
Extras
- Camera
- tripod
- drone
- lens cleaning kit
- Headphones (for bus ride)
Be sure to download our complete packing list for Iceland! It’s packed with good suggestions and insider tips to help plan your Italy trip. And it’s completely FREE, so why not!?

Where to stay nearby
Since you’ll want to get a relatively early head start for this one, we’d recommend staying in South Iceland near the start of the hike at Skógafoss.
→ Psst! Looking for a campervan rental? We put together a mega guide which includes our recommendation for the best Iceland campervan rental plus an exclusive discount code for our readers.
Camping nearby
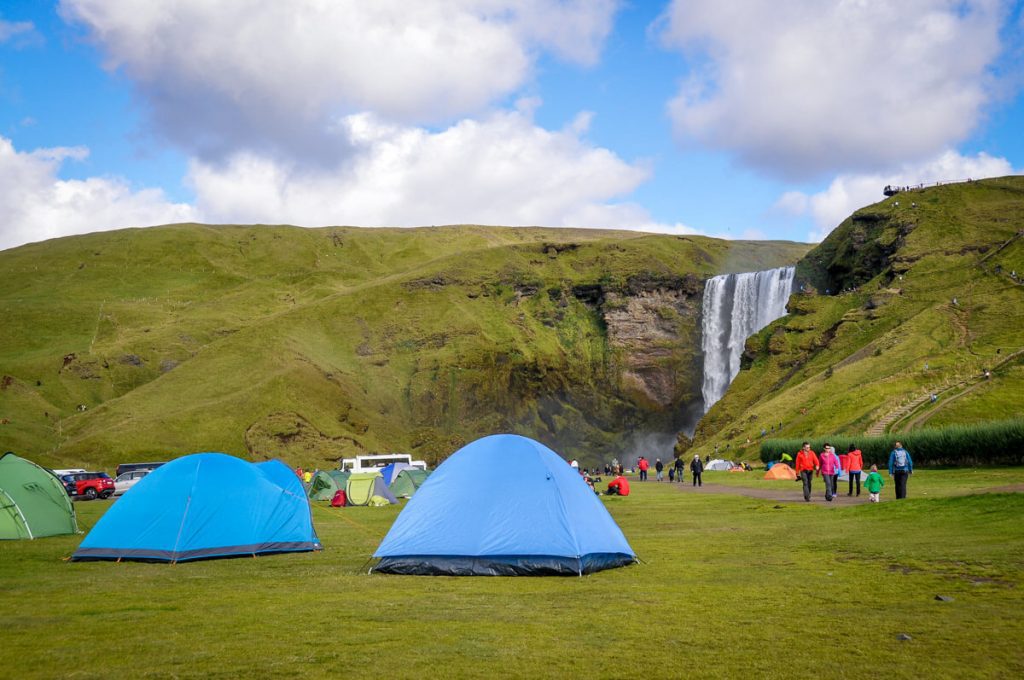
Skógar Campsite
This campsite is at the foot of Skógafoss, allowing you to get a bright and early start to the hike. With the new bus routes in place, you can get a ride right back to your campsite here after your hike.
Básar Hut & Campsite
Another camping option is to spend the night in Thórsmörk, where you end the hike. There is a picturesque campground there, toilets, water fill stations, and a small shop where you can buy drinks and snacks.
We would have really liked to stay in Basar, however, that would have required carrying camping equipment with us, so it just didn’t make sense for our trip.
Hotels nearby
Volcano Huts (in Thórsmörk): A remote location in the Thorsmork Nature Reserve makes this the perfect place to stay about an hour drive from Skógafoss and the start of the hike. They offer mixed dorm accommodations, private cottages, private rooms and even private glamping tents. All at various price points to accommodate a tighter budget.

Sólheimahjáleiga Guesthouse: Located just 15 minutes down the road from Skógafoss, this farm property offers simple, modern accommodations. There are various room sizes suitable for families, some with en suites and some with shared bathrooms. The onsite restaurant serves breakfast daily with fresh local produce.

Hótel Skógafoss: You won’t find a location better than this for the Fimmvörðuháls hike. This hotel is situated at the entrance to Skógafoss where the hike begins. Amenities include modern rooms with en suite bathrooms, free wifi throughout the property, an on site restaurant/bar and the open air Skógar Folk Museum is just a 5-minute walk down the road.

Skálakot Manor Hotel: If you’re looking for more luxurious accommodations, the beautiful Skálakot Manor offers a boutique hotel experience. The 14 rooms range from standard singles to the grand master suite. They offer horseback riding tours of the farm and surrounding areas and are just a 20 minute drive from the start of the hike.
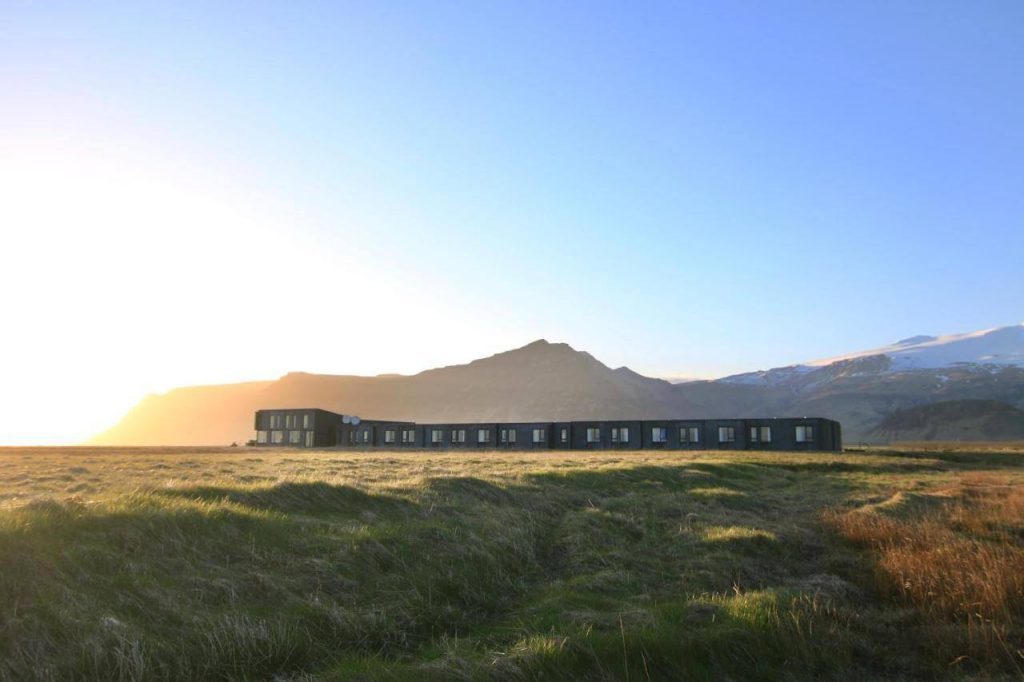
Umi Hotel: Just 15 minutes down the road from Skógafoss, this outstanding boutique property offers the peak of luxury. Choose from a selection of double-occupancy suites with sea or mountain views. And enjoy your meals at the on suite restaurant and lounge bar. The Eyjafjallajökull Erupts exhibit is also just 3 km from the hotel.
Perfect Iceland itinerary
Want to skip the stress of trip planning?
Planning a trip to Iceland can feel overwhelming—there’s so much to see, and it’s easy to miss hidden gems if you don’t know where to look. That’s why we created our done-for-you Iceland South Coast Itinerary—so you can spend less time researching and more time soaking in Iceland’s epic landscapes.

This 7–day itinerary takes you along Iceland’s breathtaking southern coast, blending adventure with a touch of luxury. You’ll visit iconic sights like Skogafoss and Diamond Beach, plus off-the-beaten-path spots most tourists miss (like a hidden waterfall that’s one of our all-time favorites!).
With detailed daily plans, insider tips, driving directions, and hand-picked stays, this guide takes the guesswork out of planning so you can experience Iceland stress-free.
Other epic hikes to add to your bucket list
If you’re reading this article, I imagine you’re a hiking enthusiast.
- Tongariro Crossing, New Zealand: Widely considered to be the best day hike in New Zealand, this is a can’t-miss if you’re visiting the North Island.
- Routeburn Track, New Zealand: If you’re traveling in New Zealand, you’ll want to add this hike to your list as well. This multi-day trek on the South Island is one of the best hikes in the country.
- Old Man of Storr, Scotland: This hike on the Isle of Skye brings you up close to some otherworldly rock formations.
- Kumano Kodo, Japan: This multi-day pilgrimage trek in Japan is a perfect blend of adventure, nature and culture.
- Volcan Acatenango, Guatemala: This overnight hike just outside Antigua allows you front seat views to watch the neighboring Volcan Fuego erupt all night long.
- Ijen Crater, Indonesia: This classic sunrise hike in East Java ends with epic views over a neon blue crater lake.
- Inca Trail: This classic trek in Peru is worthy of a top spot on your hiking bucket list.
- Everest Base Camp: If you’re looking for a hike you’ll be telling your grandkids about, this is it! Stay at tea houses along the way and make lifelong friends.
Plan your trip to Iceland
We have TONS of resources on travel in Iceland and how to make the most out of your trip. Check out our Iceland Homepage for all the answers to your most burning questions, or read some of our favorite articles below.
- Check out all of our top recommendations for things to do in Iceland.
- Figure out thebest time to visit Iceland based on weather, crowds, and activities.
- Start with this 7-day Iceland itinerary if it’s your first time visiting.
- This step-by-step guide will help you plan an unforgettable Iceland road trip.
- You’ll want to keep this guide handy if you plan on driving Iceland’s Golden Circle.
- Bookmark these must-see stops along Iceland’s Ring Road before you hit the road.
- Read up on all the actually cool things to do in Reykjavik.
- Be sure to download these essential Iceland travel apps before your trip!
Don’t miss your chance to grab our Iceland packing list!

Click the banner to download our complete packing list for Iceland! It’s packed with good suggestions and insider tips to help plan your Iceland trip.
And it’s completely FREE, so why not!?
Save this article on Pinterest for later!
We want to hear from you!
Are you planning to do the Fimmvörðuháls hike and have more questions? Leave a comment below and we’ll do our best to get you the answers you’re looking for!

Katie Diederichs is the lead writer and co-founder of Two Wandering Soles, where she creates in-depth travel guides, itineraries, and tips designed to help readers plan better trips with confidence. With a background in journalism, photography, and design, she combines thorough research with firsthand experience to deliver clear, practical, and visually driven travel content. As the primary trip planner, Katie turns complex logistics into easy-to-follow advice travelers can actually use.
This is an exceptionally well-structured and experience-driven guide that sets a high benchmark for long-form travel content, especially for serious hikers planning the Fimmvörðuháls trail. The way the article breaks down the hike into clear sections, landscapes, logistics, safety, packing, and real-time experience, makes it both inspiring and extremely practical for readers who value preparation and authenticity. At Trexmount Ventures, we strongly resonate with this level of detail and storytelling, as our focus is on helping travelers plan challenging adventures with confidence, clarity, and local insight. For readers who enjoy immersive hikes, well-researched routes, and stress-free travel planning, exploring Trexmount Ventures can be a valuable next step toward crafting meaningful outdoor journeys.